Quick Start
A step-by-step guide for setting up WorkOS Widgets in your application.
In this guide, you’ll add WorkOS Widgets to your application. By the end, you’ll have a working widget integrated with your authentication flow, complete with styles and CORS configuration.
Install the @workos-inc/widgets package from the npm registry, along with its peer dependencies:
WorkOS Widgets uses Radix Themes for UI components and style customization, and TanStack Query for data fetching and caching. Both are required as peer dependencies to avoid duplication, version conflicts, and bloated bundles.
Widgets can be used in any client- or server-rendered React application. See the Widgets examples on GitHub for integration examples across various frameworks.
Import styles exported from both Radix Themes and WorkOS Widgets. Radix Themes provides beautiful default styles with zero configuration.
Widgets can be customized using the theme prop or with plain CSS. See the styling guide for more details.
Render the WorkOsWidgets component at the top of your application. This component manages context for data fetching and provides theme styles to all Widgets.
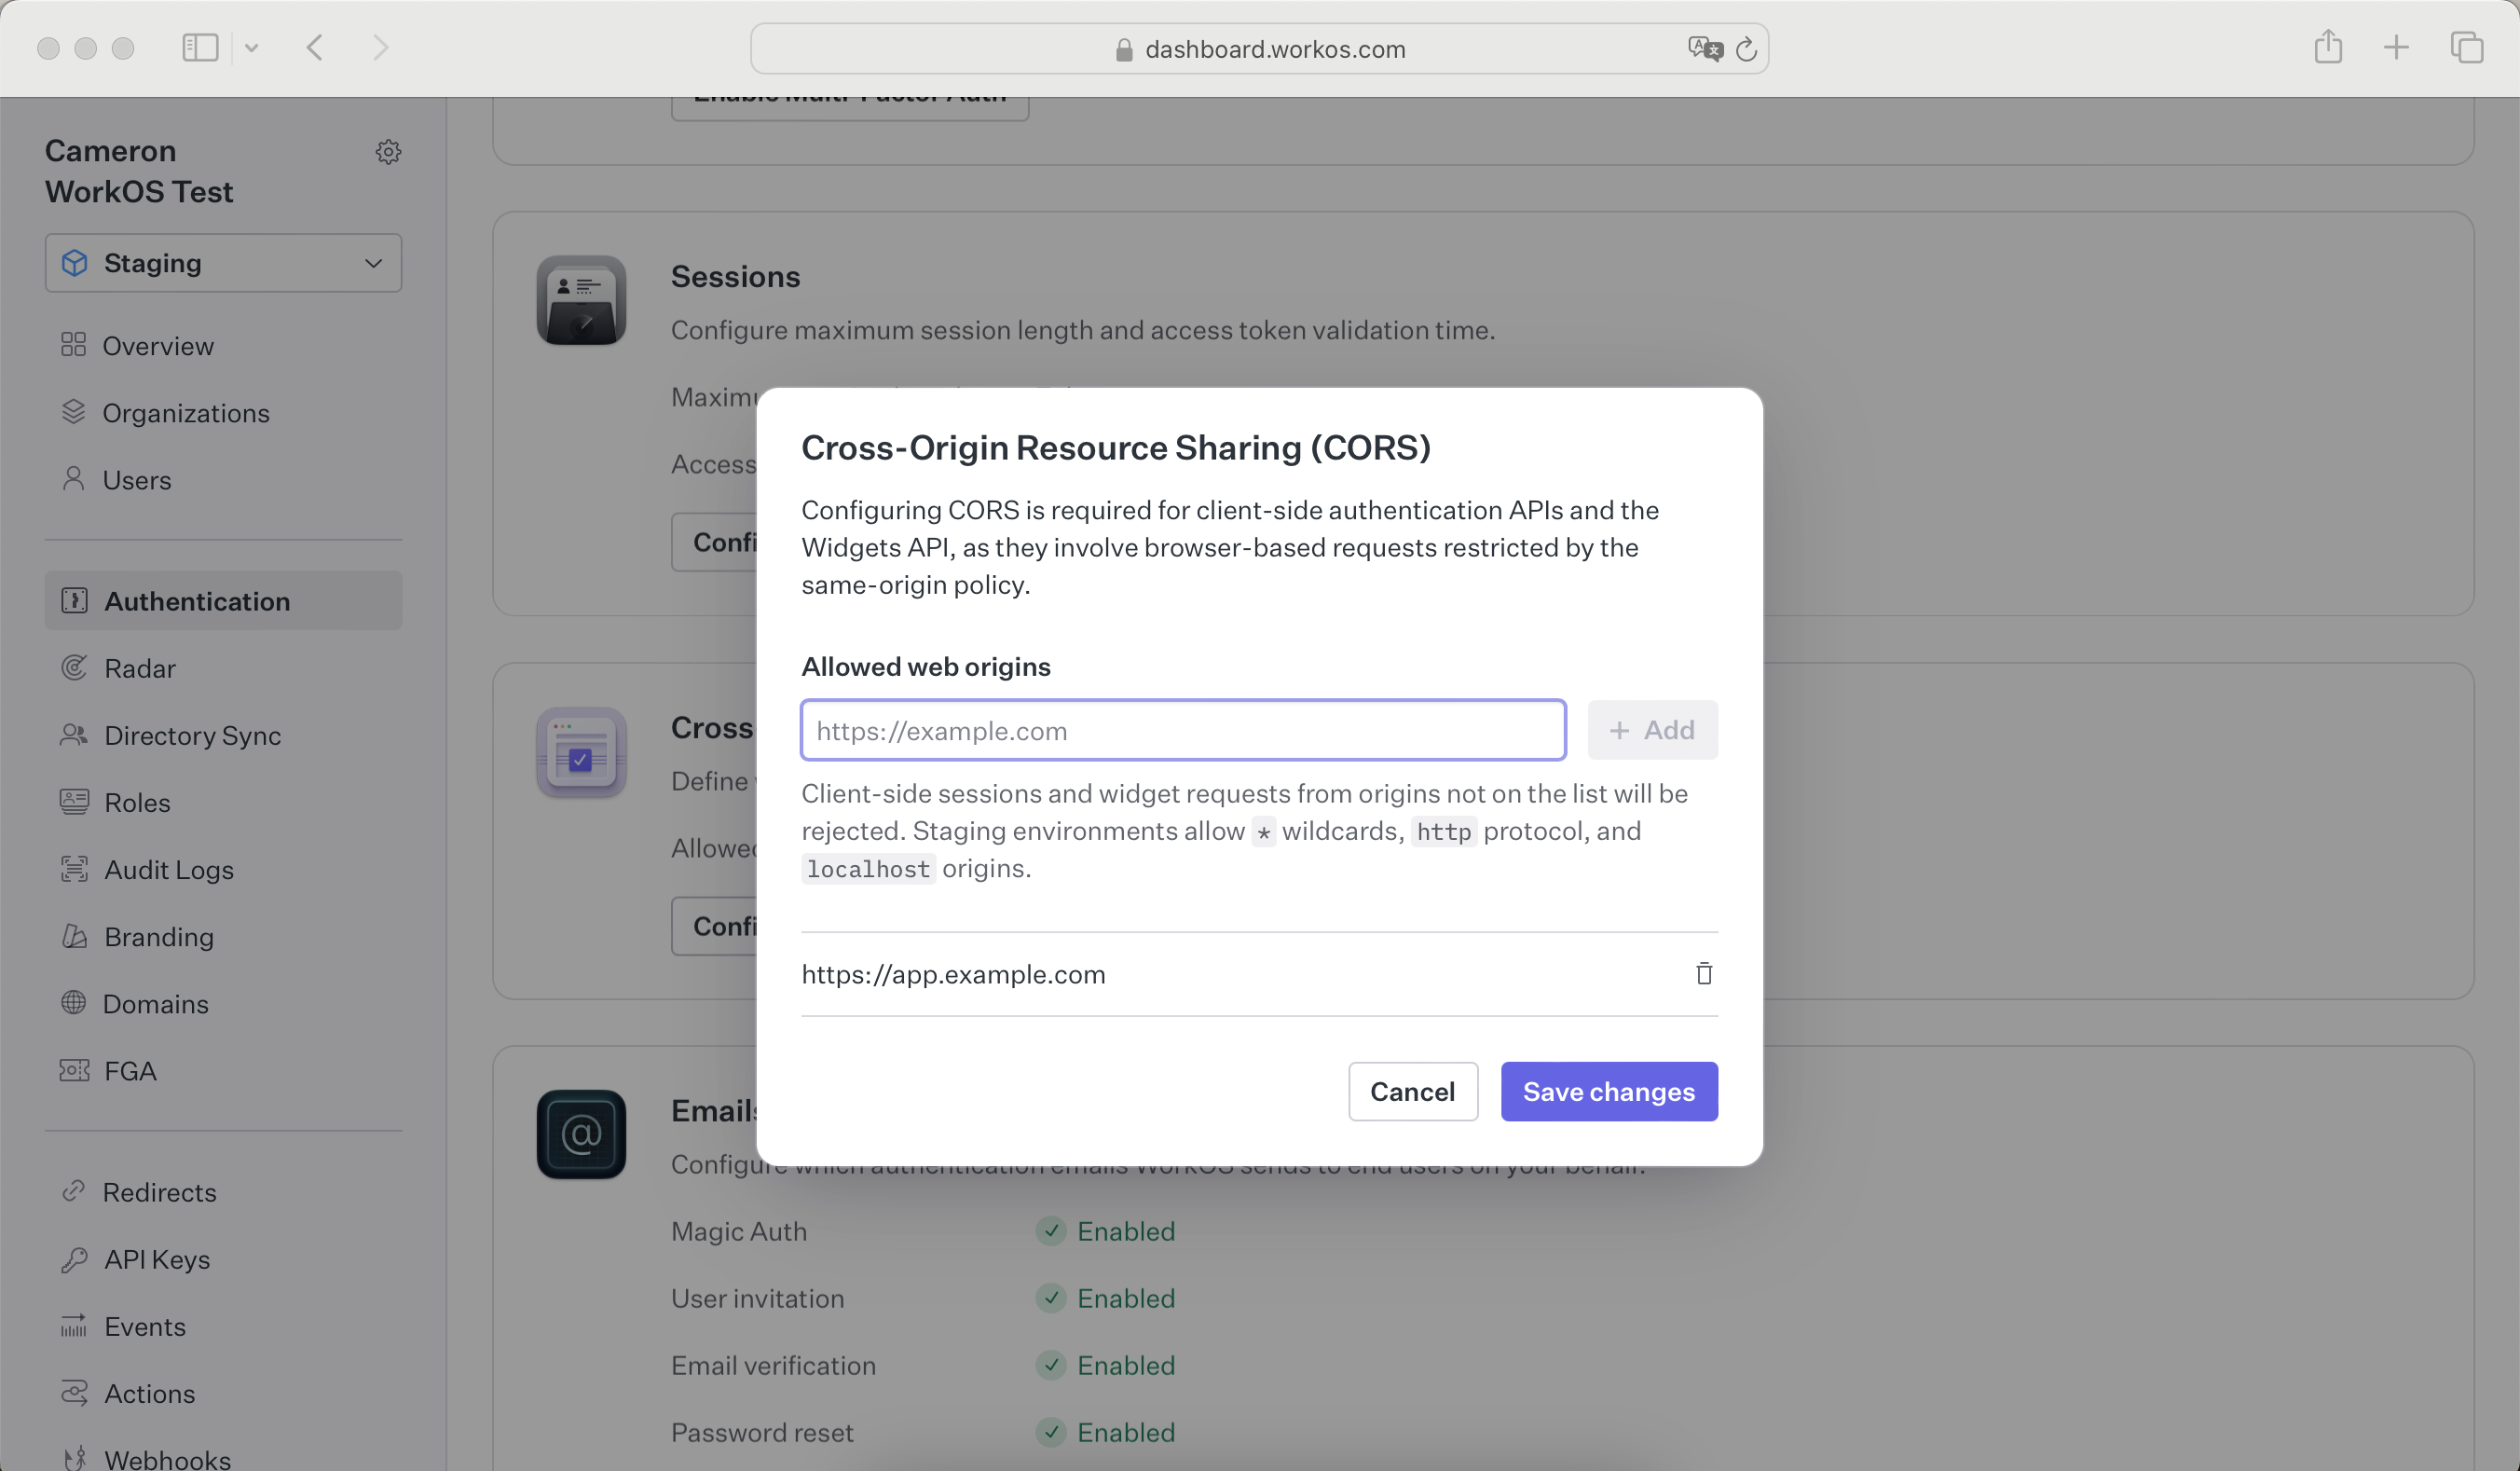
Configure your site as an allowed web origin because WorkOS Widgets issue client-side requests to WorkOS. Add your origin in the Authentication section of the dashboard to prevent CORS issues when using the widget.