Impersonation
Sign into your application as one of your users.
Enable impersonation to let support staff sign in as a user for debugging purposes.
Since impersonation allows any member of your WorkOS team to bypass the normal authentication flow for a user, it is not enabled by default in any of your environments. The Admin role is required to enable impersonation for an environment.
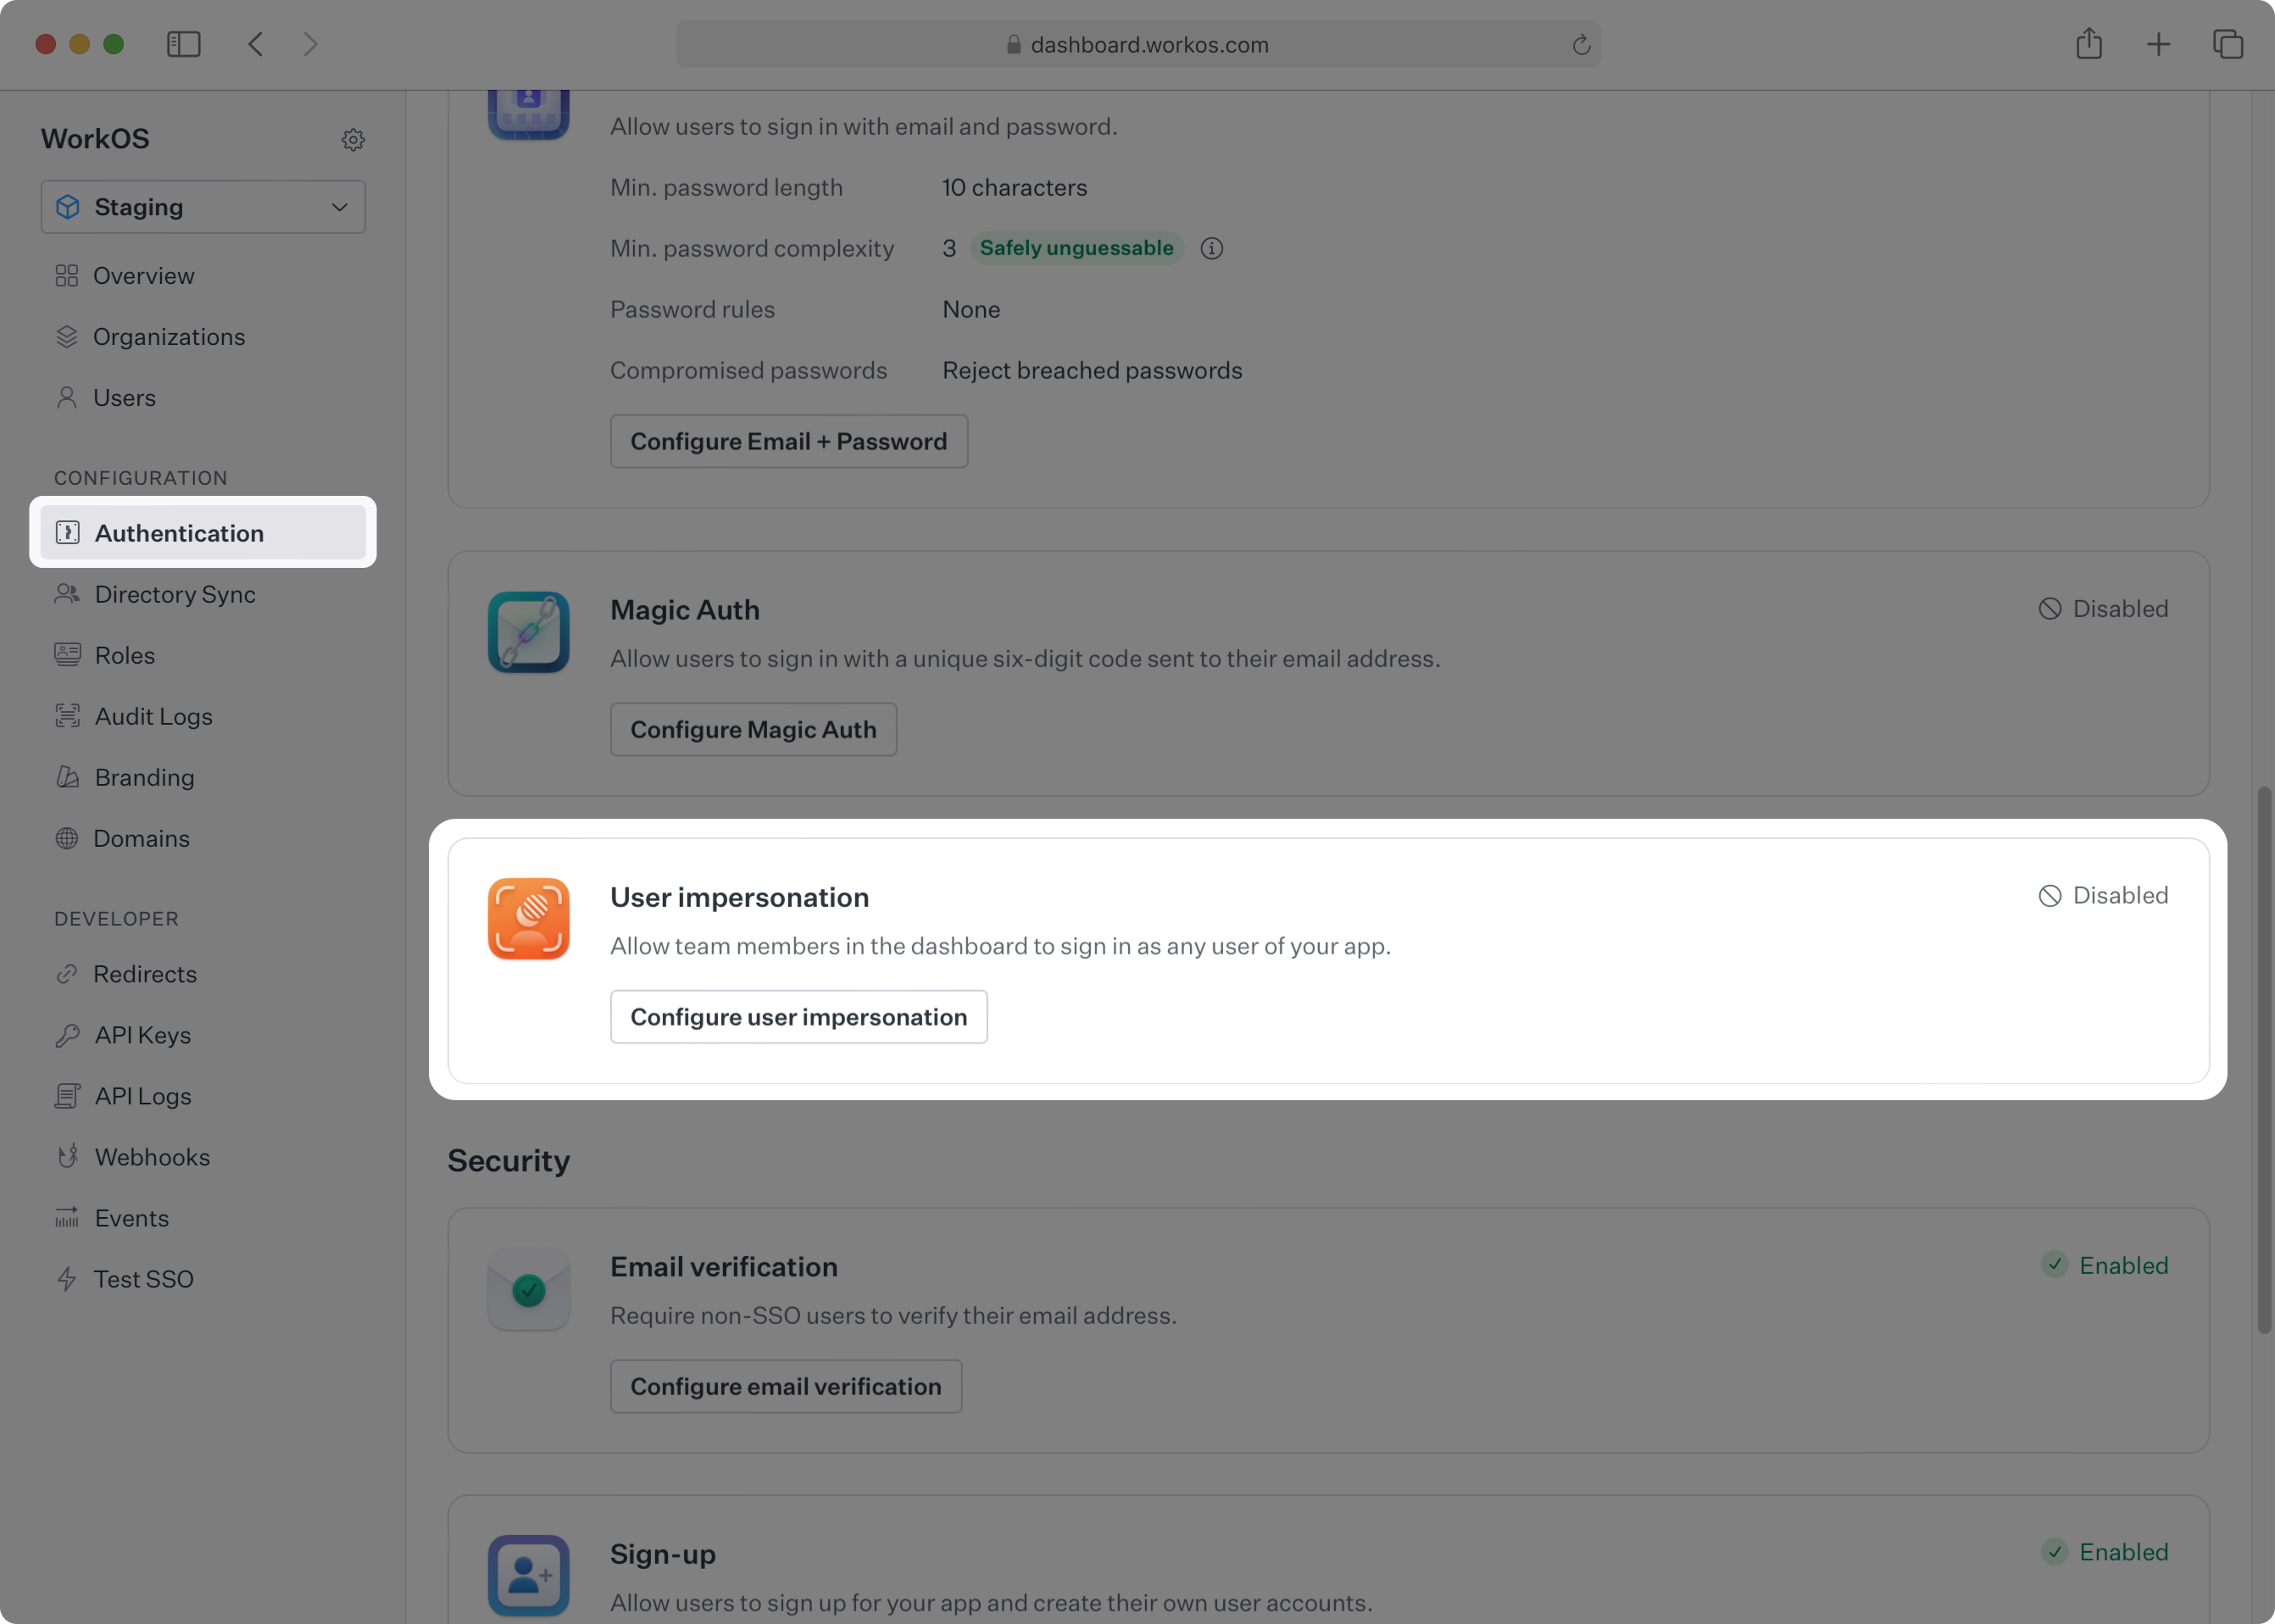
Navigate to Authentication → User Impersonation and select Configure to enable impersonation for your current environment.
To impersonate one of your users, navigate to Users, select the target user, and under Danger Zone select Impersonate User.
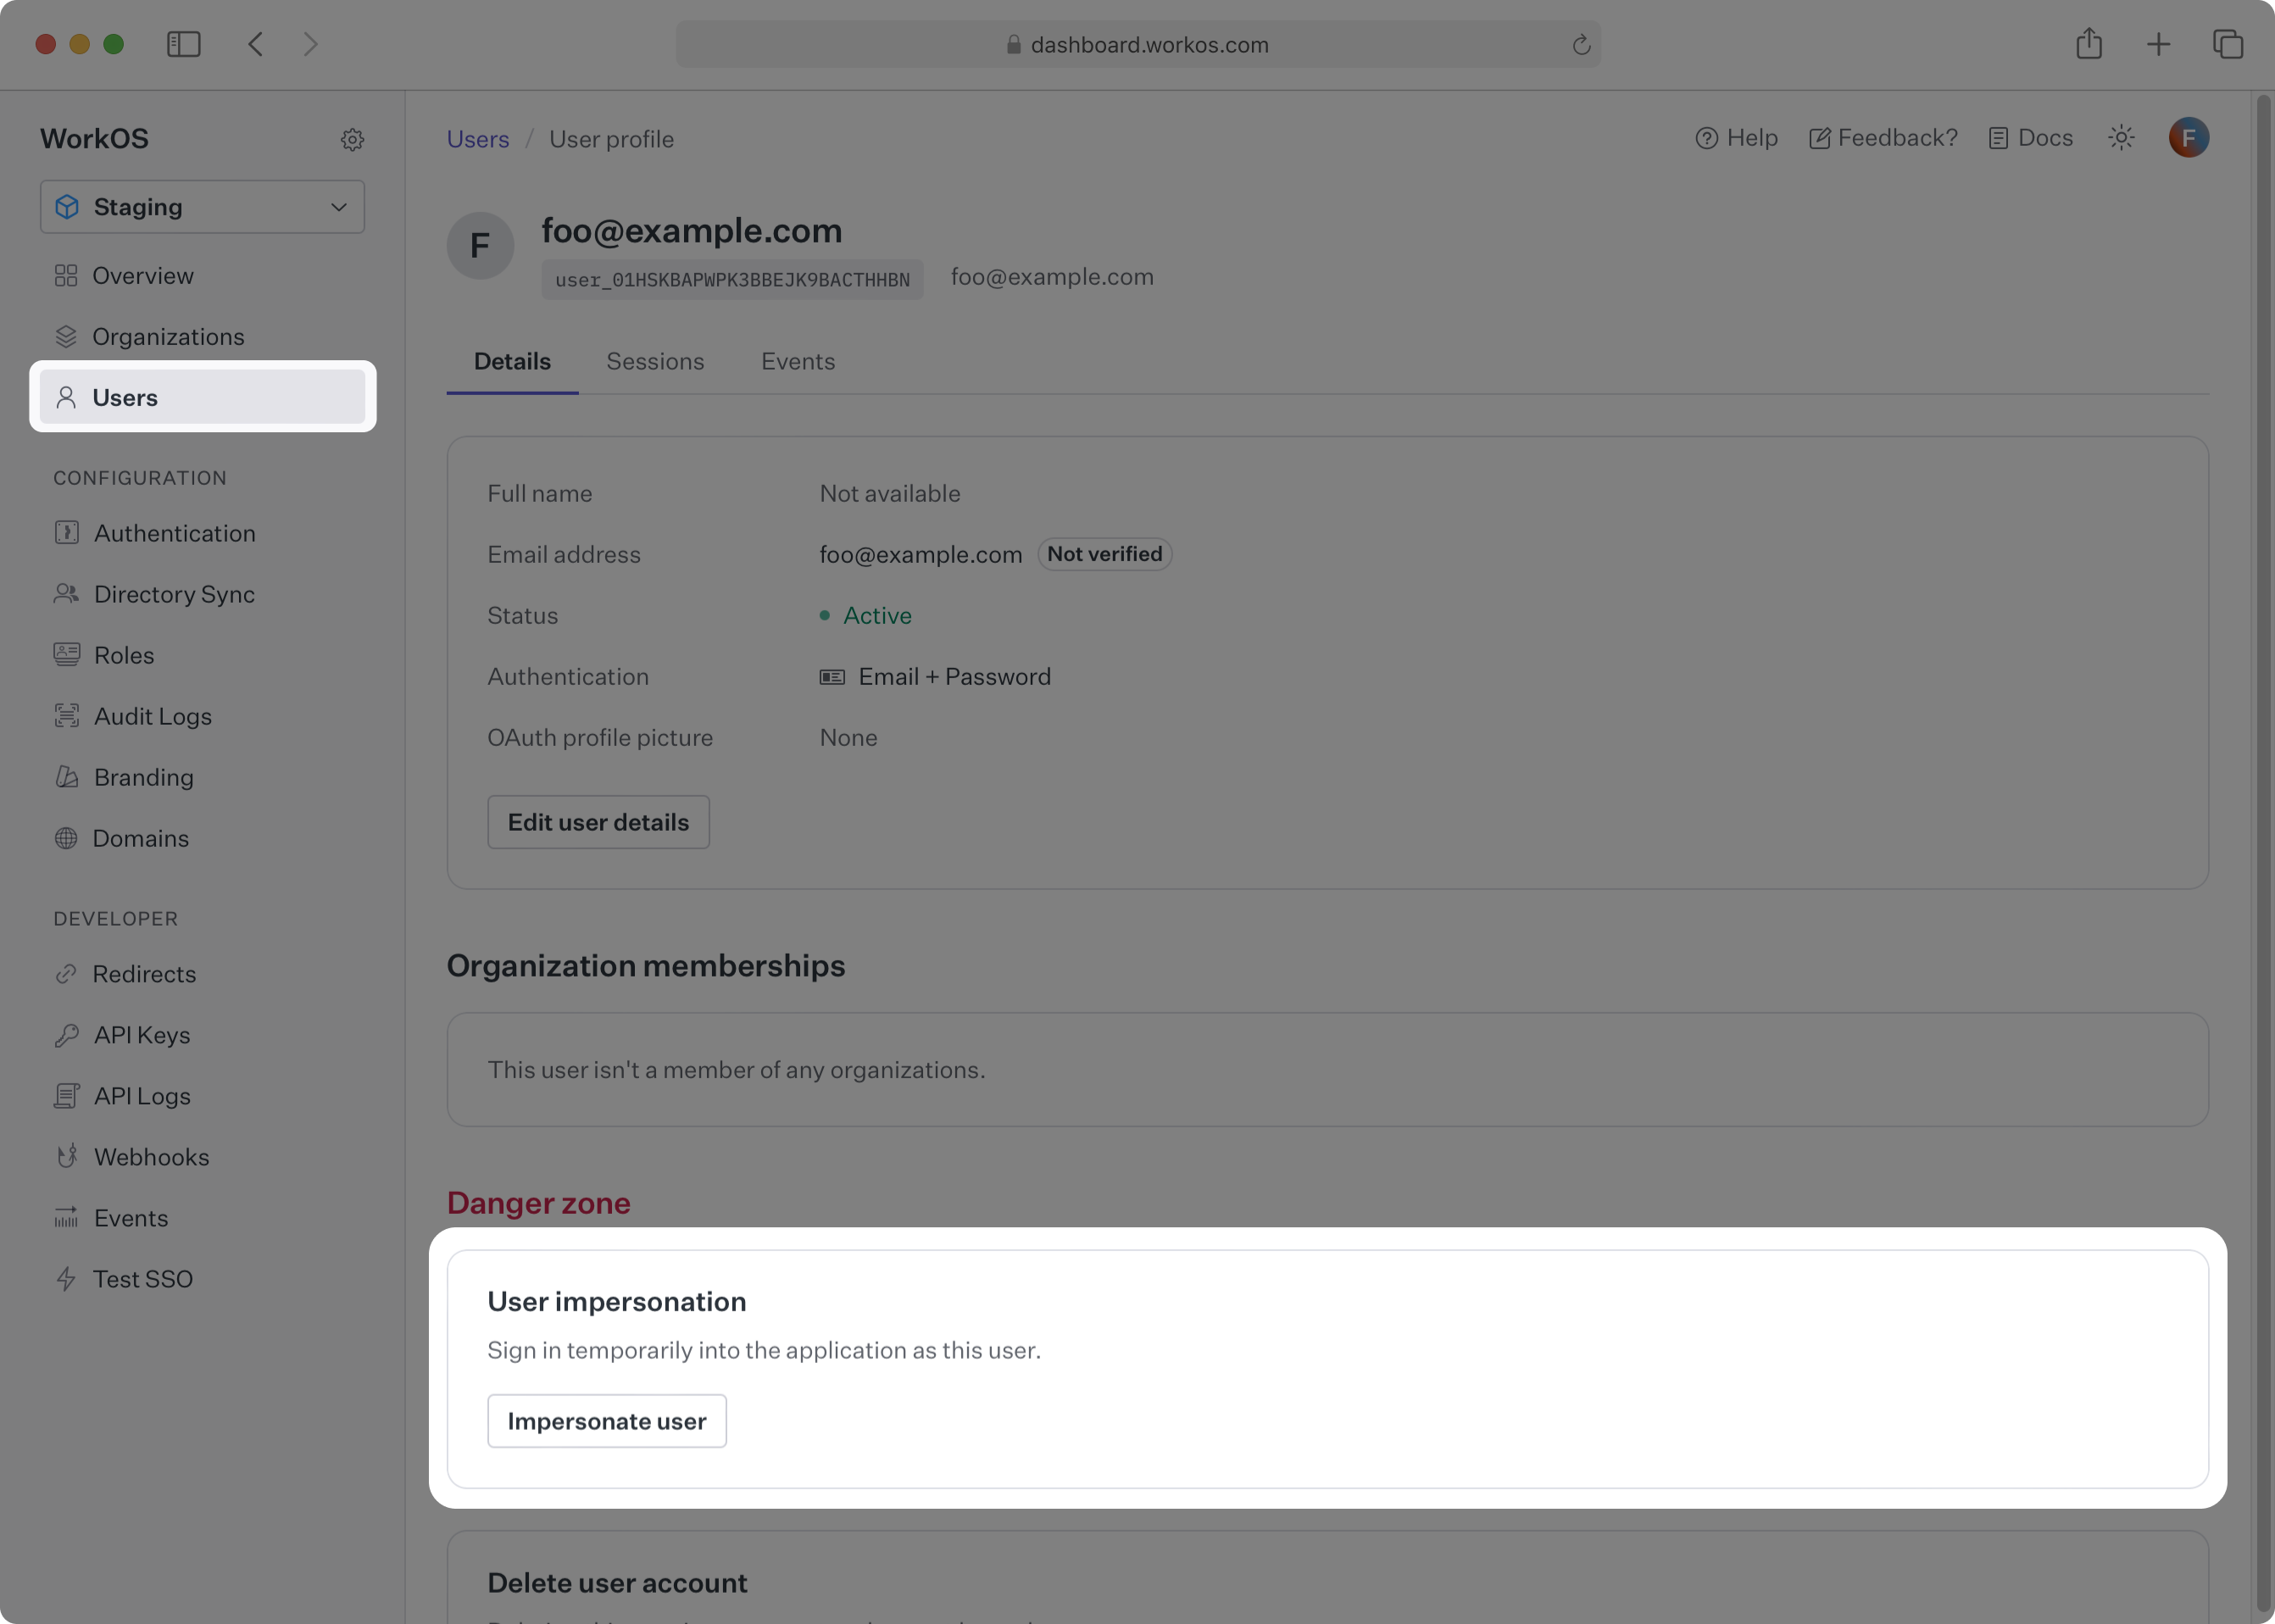
A prompt appears for the reason for impersonation. The reason is required and is recorded internally on the session.created event that is emitted whenever impersonation is used.
If the user is a member of more than one organization, choose which of these organizations to sign into as the user. Read more about users and organizations in the dedicated guide.
Finally, click Impersonate user to start an impersonation session, which redirects the browser to your application’s callback endpoint with an authorization code for the impersonated user. For details on implementing a callback endpoint, see the Quick Start guide.
Impersonation sessions automatically expire after 60 minutes.
Impersonating a user generally gives the same level of access as that user, allowing the impersonator to see the user’s information. If your application contains sensitive user data, see the Integrating impersonation section to customize your application behavior during impersonation.
Deep-link to the impersonation flow in the WorkOS Dashboard from your own admin tool using the following URL structure:
https://dashboard.workos.com/<environment_id>/users/<user_id>/details?dialog=impersonate
User sessions that were initiated via impersonation will be clearly marked as such when viewing their details in the WorkOS Dashboard. Additionally, WorkOS emits a session.created event which you can view under the events for the user, or listen for in your application via the events API.

The session.created event has an impersonator field that contains information about the impersonation session, like the email of your team member who performed the impersonation, along with their reason for doing so.
No additional code is required to start using impersonation once you have integrated with WorkOS. However, consider augmenting your application’s behavior when your team members are impersonating one of your users.
The response from the Authenticate with Code API will include an additional impersonator field when the resulting session was created via impersonation, containing the impersonator’s email and reason for using impersonation. Similarly, the access_token will include an act claim with the impersonator’s email. Your application can use either in order to trigger impersonation-specific behavior.
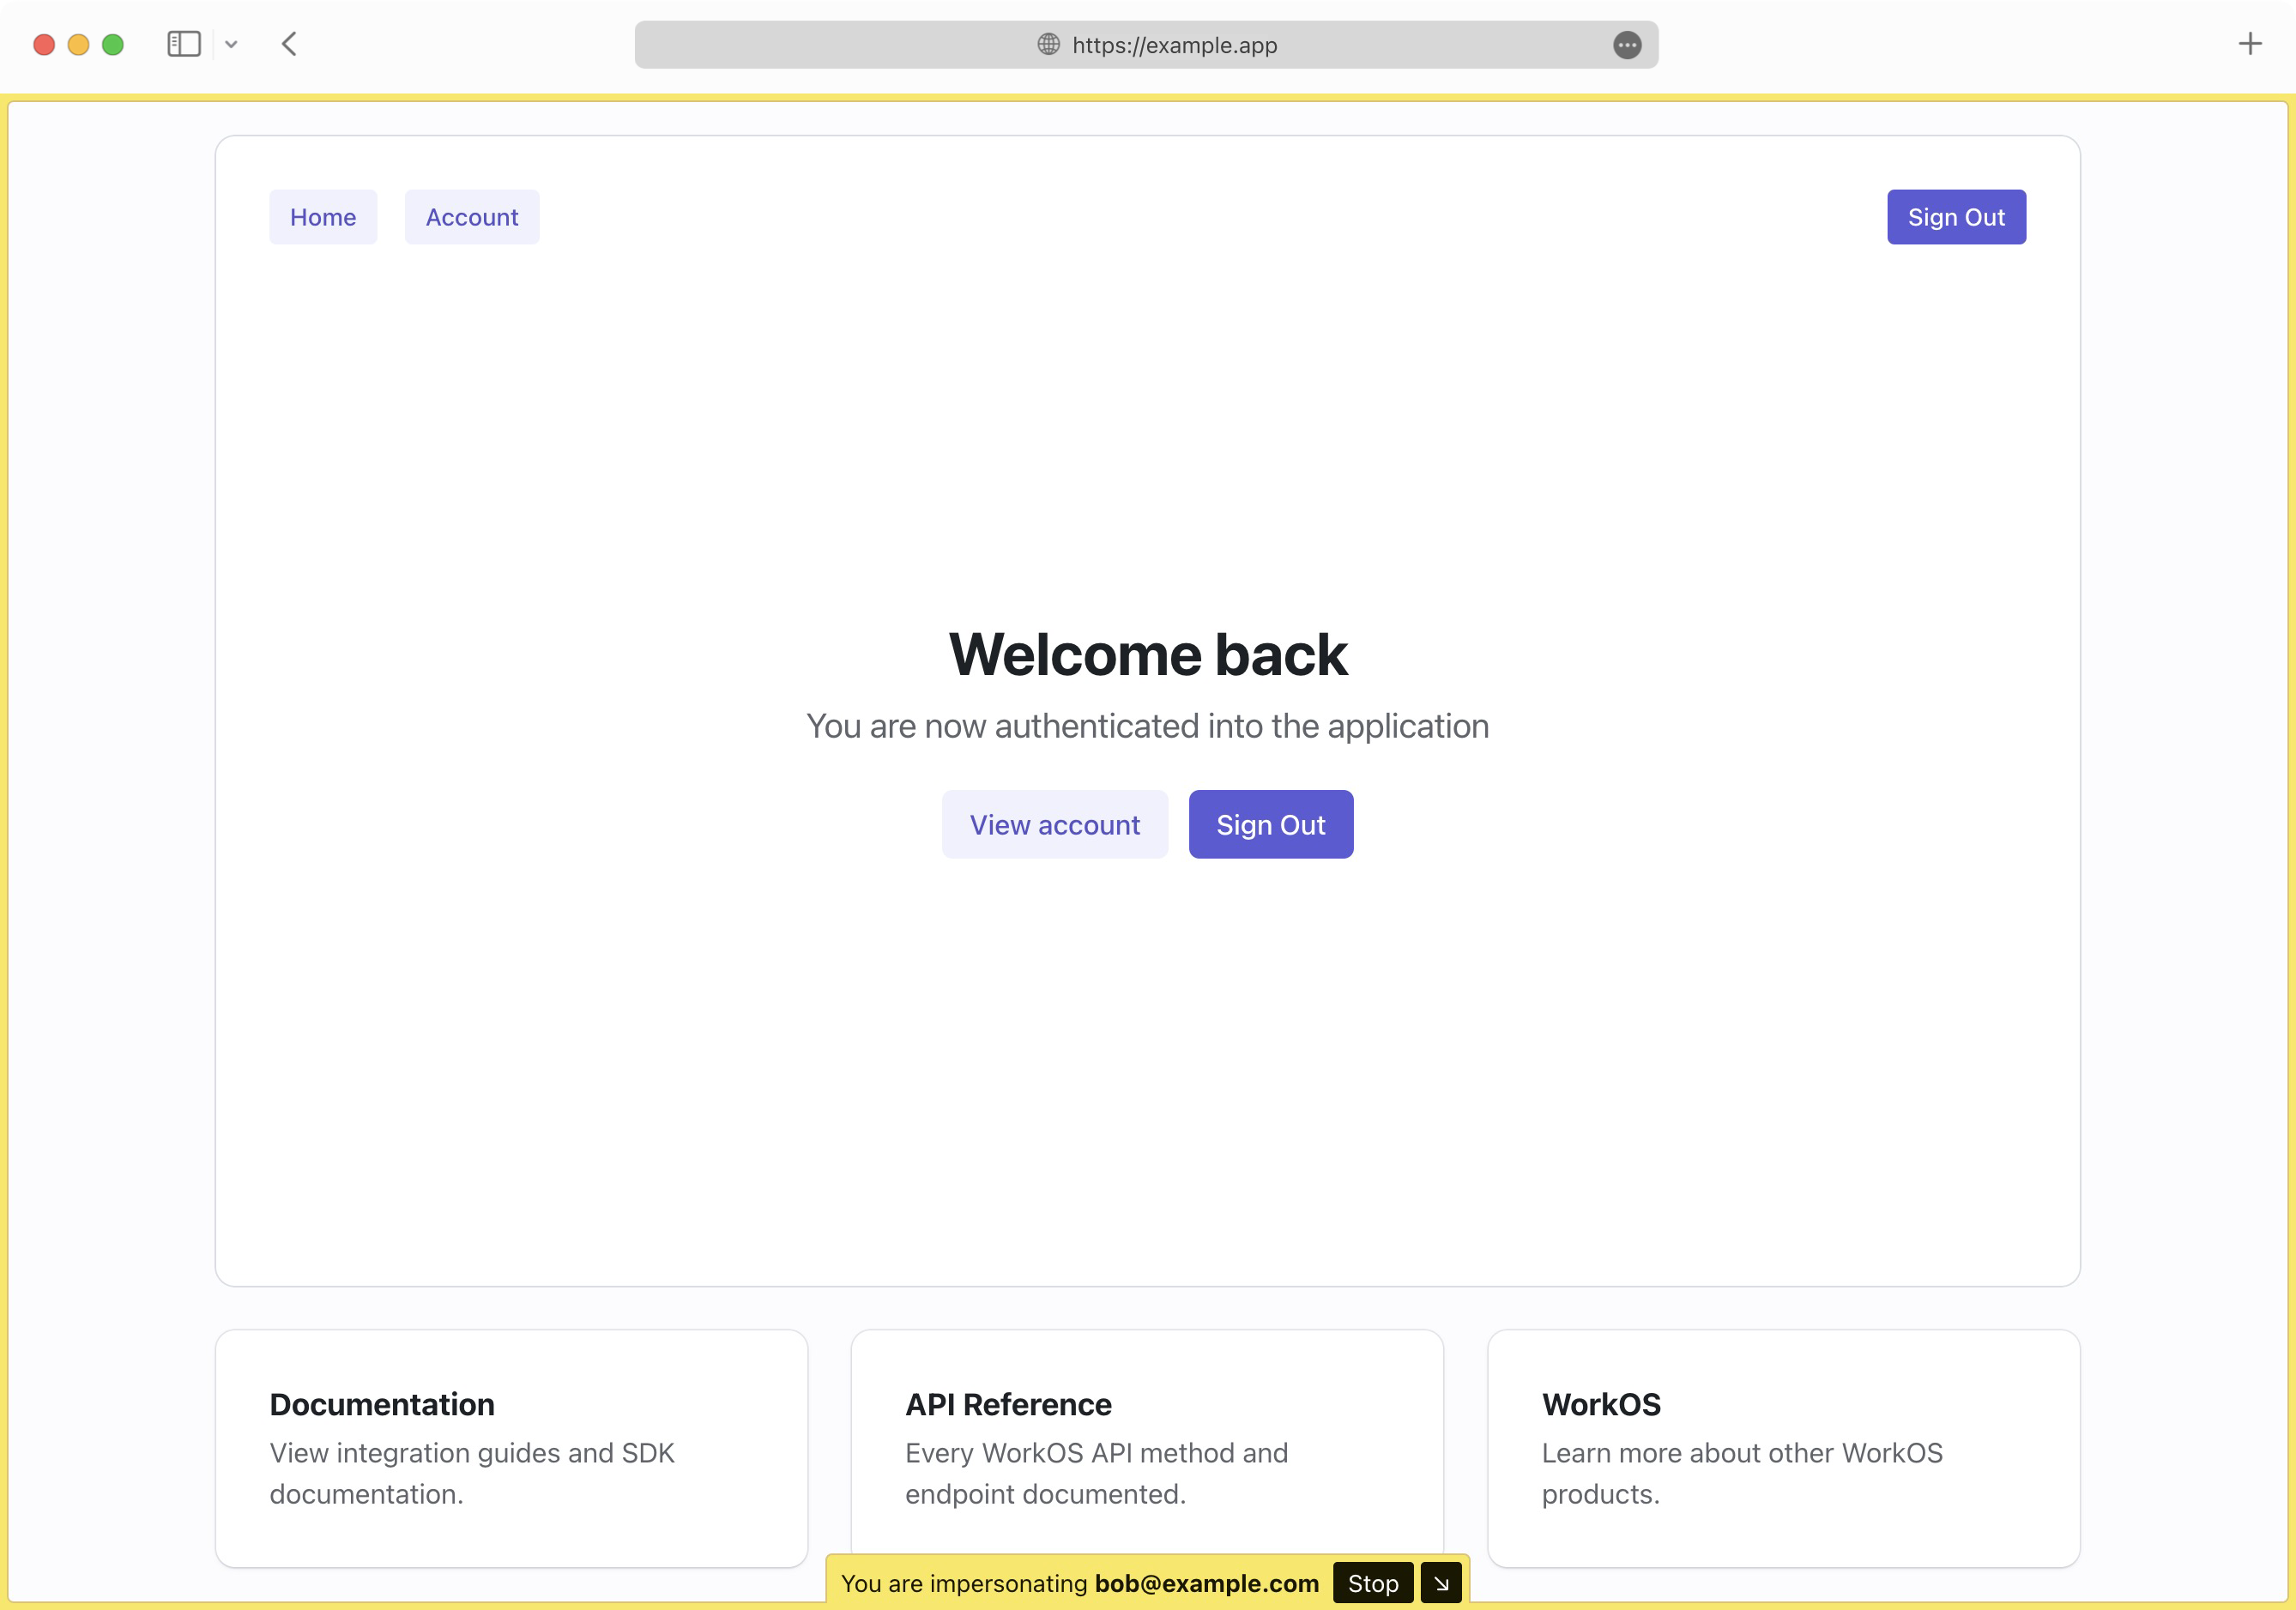
A common enhancement is to change the appearance of the application to make it obvious that an impersonation session is active, such as displaying a “Staff Bar” at the top of the viewport. Also consider restricting access to sensitive views or redacting certain fields in your application.
The authkit-nextjs library provides a built-in helper component for impersonation.
After completing the setup instructions in the quick start guide, add the Impersonation component to your app code.
The above will automatically render a visually distinct frame on your page with an option to hide it or stop the impersonation session.